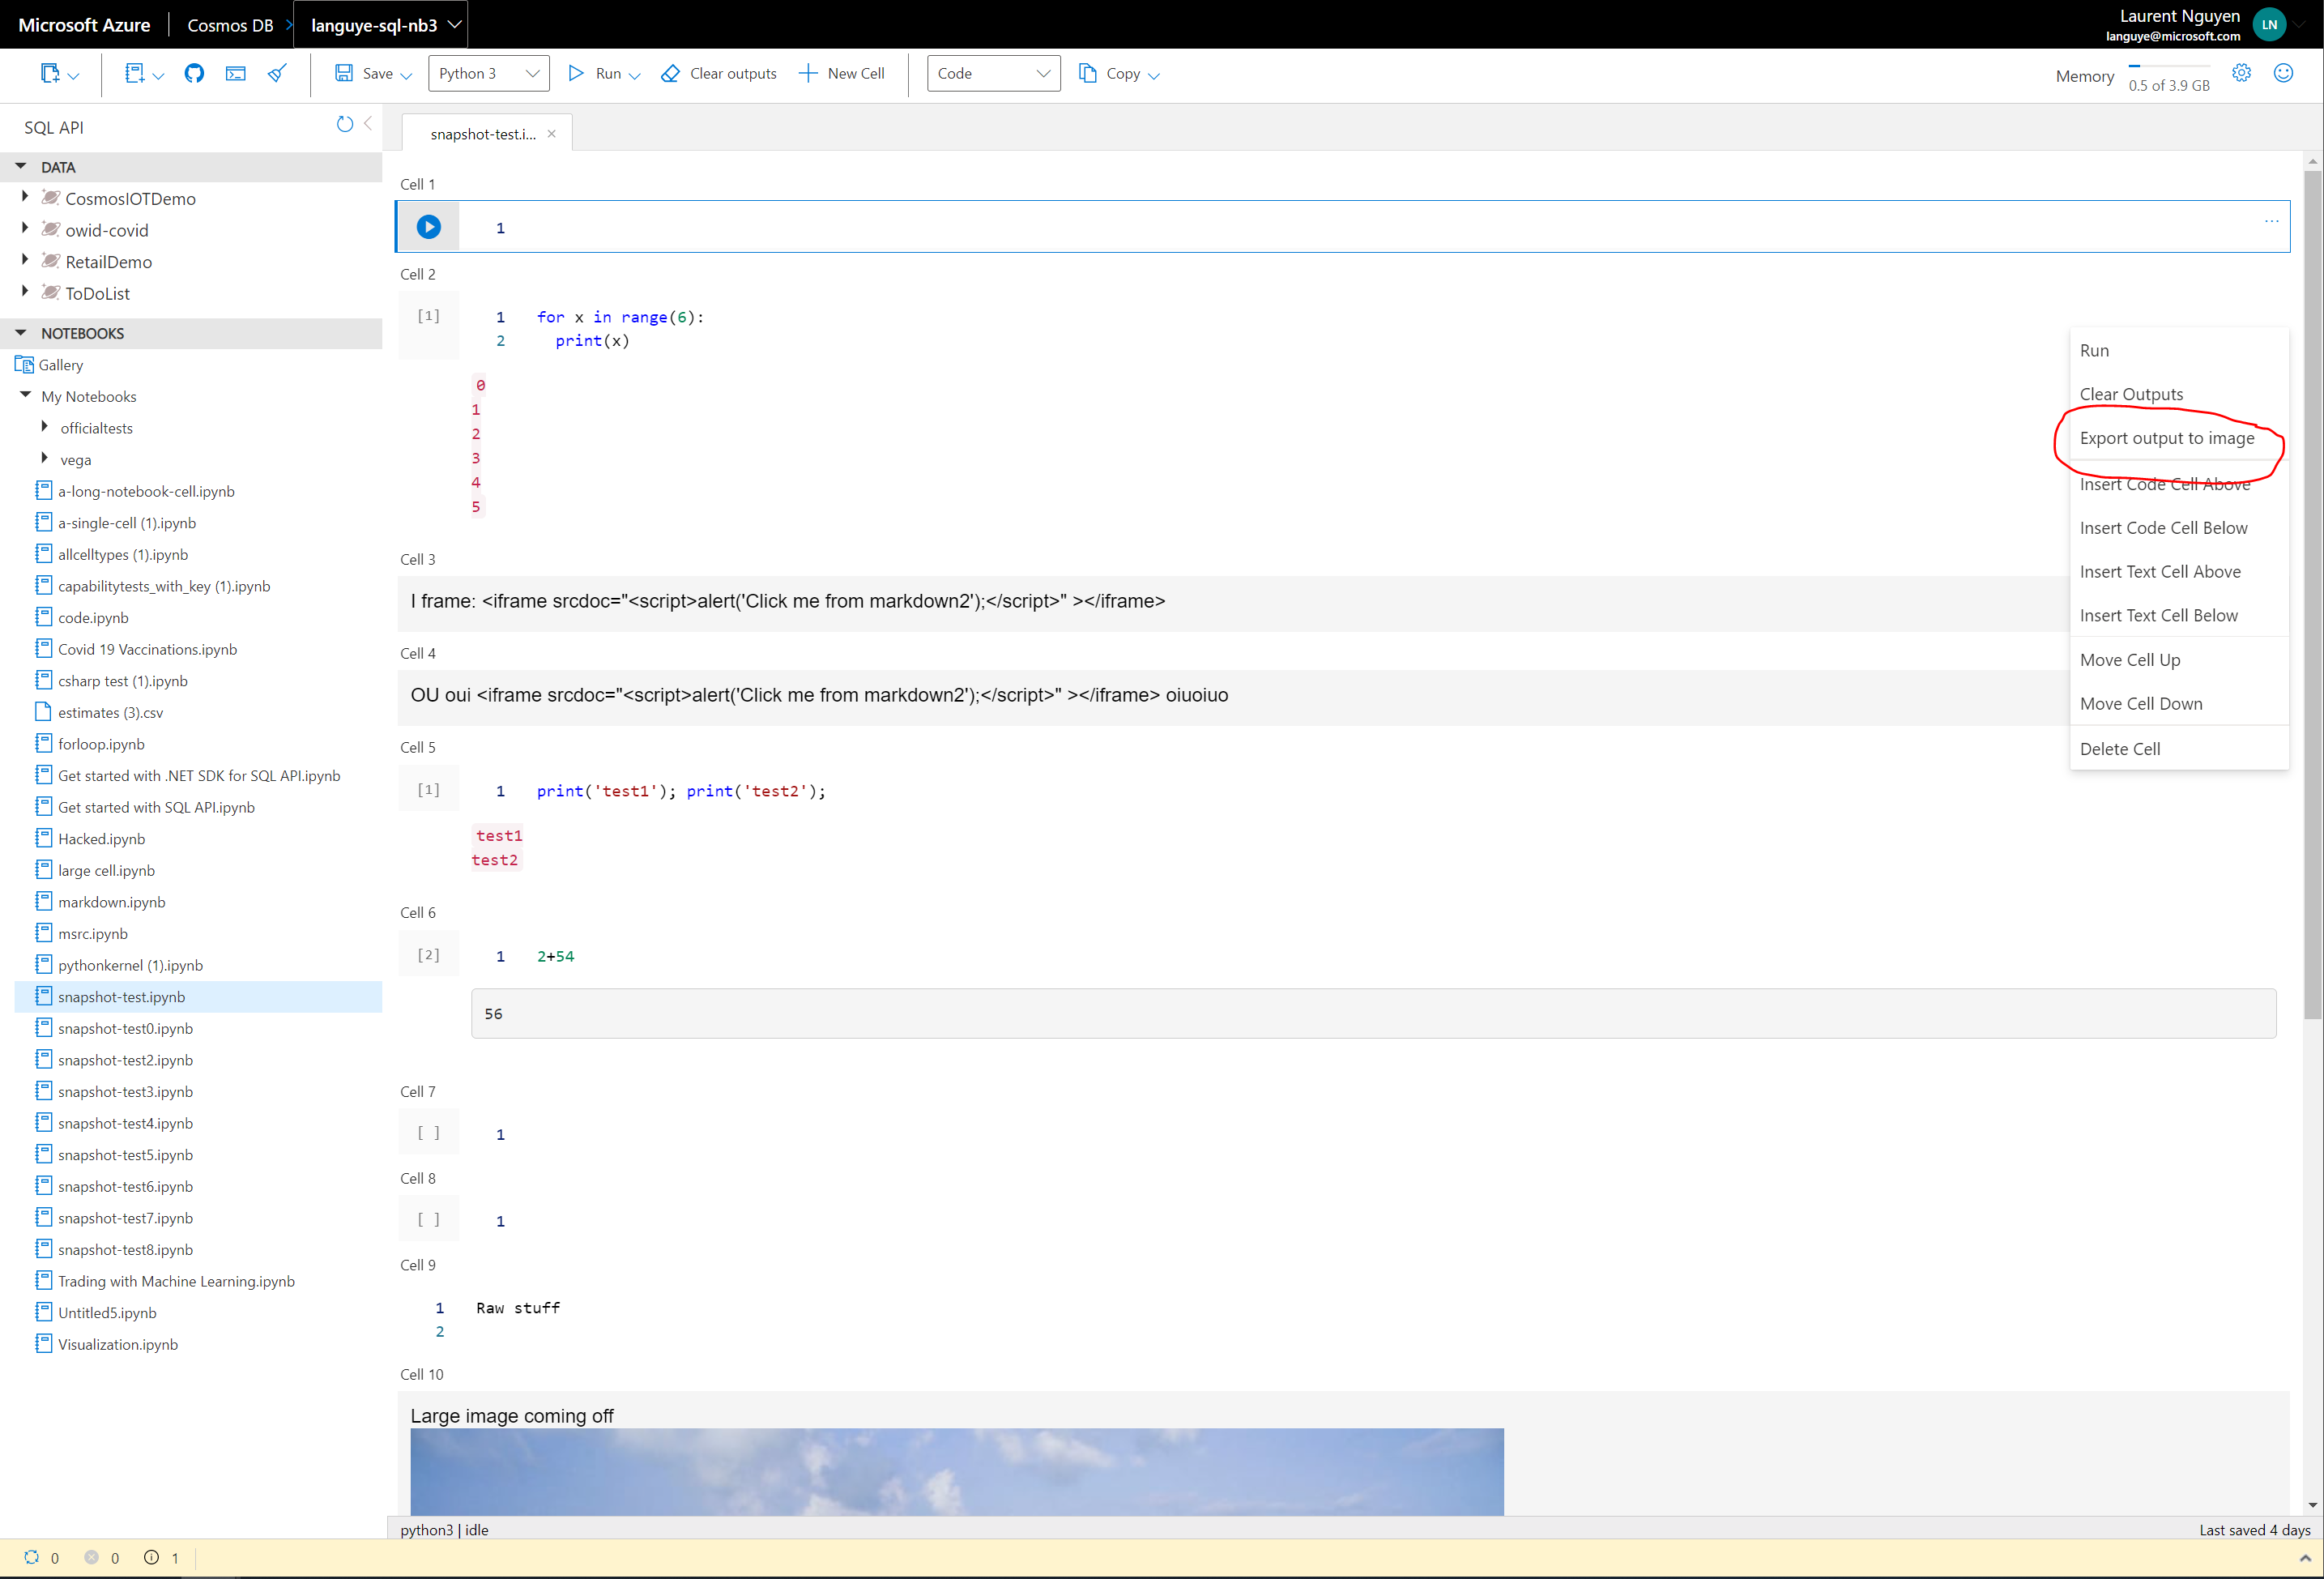
[Preview this branch](https://cosmos-explorer-preview.azurewebsites.net/pull/762?feature.someFeatureFlagYouMightNeed=true) The main change in this PR fixes the snapshot functionality in the Publish pane-related components. Because the code cell outputs are now rendered in their own iframes for security reasons, a single snapshot of the notebook is no longer possible: each cell output takes its own snapshot and the snapshots are collated on the main notebook snapshot. - Move the snapshot functionality to notebook components: this removes the reference of the notebook DOM node that we must pass to the Publish pane via explorer. - Add slice in the state and actions in notebook redux for notebook snapshot requests and result - Add post robot message to take snapshots and receive results - Add logic in `NotebookRenderer` to wait for all output snapshots done before taking the main one collating. - Use `zustand` to share snapshot between Redux world and React world. This solves the issue of keeping the `PanelContainer` component generic, while being able to update its children (`PublishPanel` component) with the new snapshot. Additional changes: - Add `local()` in `@font-face` to check if font is already installed before downloading the font (must be done for Safari, but not Edge/Chrome) - Add "Export output to image" menu item in notebook cell, since each cell output can take its own snapshot (which can be downloaded) 
Cosmos DB Explorer
UI for Azure Cosmos DB. Powers the Azure Portal, https://cosmos.azure.com/, and the Cosmos DB Emulator
Getting Started
npm installnpm run build
Developing
Watch mode
Run npm start to start the development server and automatically rebuild on changes
Hosted Development (https://cosmos.azure.com)
- Visit:
https://localhost:1234/hostedExplorer.html - The default webpack dev server configuration will proxy requests to the production portal backend:
https://main.documentdb.ext.azure.com. This will allow you to use production connection strings on your local machine.
Emulator Development
- Start the Cosmos Emulator
- Visit: https://localhost:1234/index.html
Setting up a Remote Emulator
The Cosmos emulator currently only runs in Windows environments. You can still develop on a non-Windows machine by setting up an emulator on a windows box and exposing its ports publicly:
-
Expose these ports publicly: 8081, 8900, 8979, 10250, 10251, 10252, 10253, 10254, 10255, 10256
-
Download and install the emulator: https://docs.microsoft.com/en-us/azure/cosmos-db/local-emulator
-
Start the emulator from PowerShell:
> cd C:/

> .\CosmosDB.Emulator.exe -AllowNetworkAccess -Key="<EMULATOR MASTER KEY>"
Portal Development
- Visit: https://ms.portal.azure.com/?dataExplorerSource=https%3A%2F%2Flocalhost%3A1234%2Fexplorer.html
- You may have to manually visit https://localhost:1234/explorer.html first and click through any SSL certificate warnings
Testing
Unit Tests
Unit tests are located adjacent to the code under test and run with Jest:
npm run test
End to End CI Tests
Jest and Puppeteer are used for end to end browser based tests and are contained in test/. To run these tests locally:
- Copy .env.example to .env
- Update the values in .env including your local data explorer endpoint (ask a teammate/codeowner for help with .env values)
- Make sure all packages are installed
npm install - Run the server
npm run startand wait for it to start - Run
npm run test:e2e
Releasing
We generally adhere to the release strategy documented by the Azure SDK Guidelines. Most releases should happen from the master branch. If master contains commits that cannot be released, you may create a release from a release/ or hotfix/ branch. See linked documentation for more details.
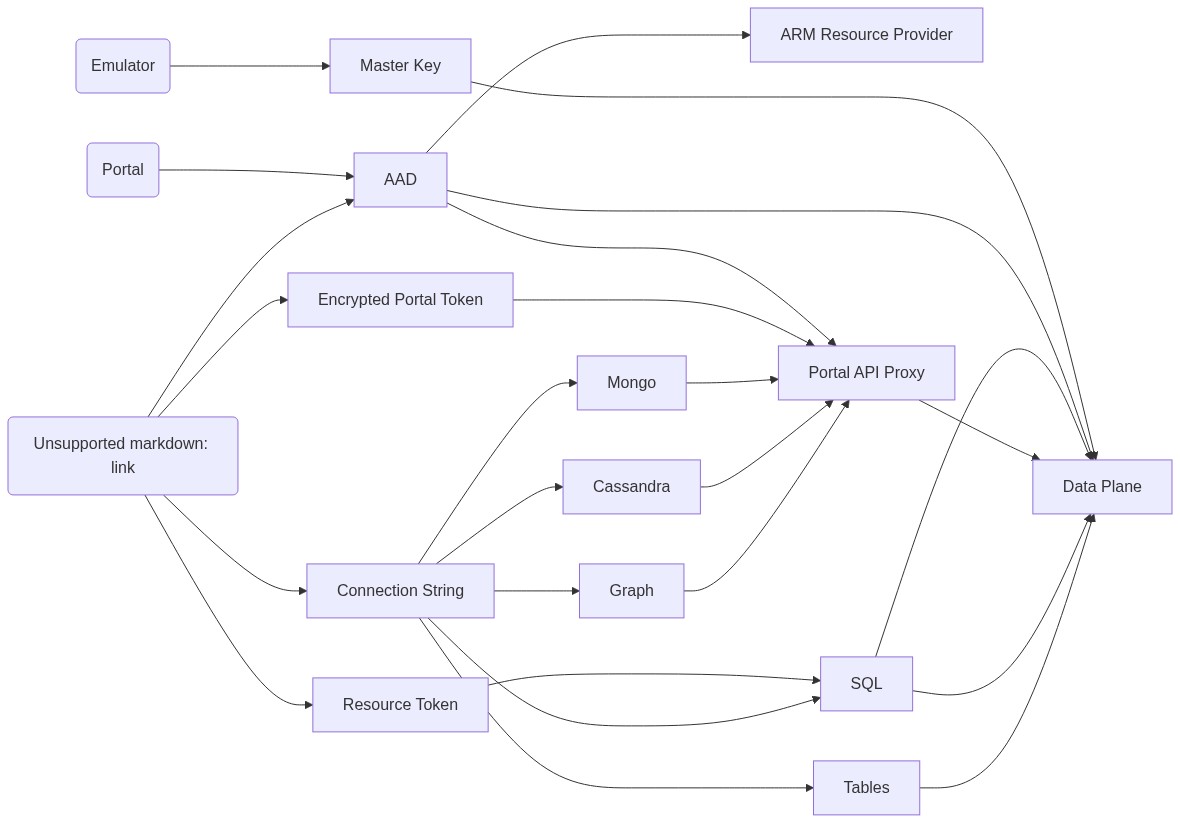
Architecture
Contributing
Please read the contribution guidelines.

